
Artificial grass is usually installed in order to replace an existing lawn and is a wonderful way by which you can transform the old paths and patio areas in your home. If done properly, artificial grass is so versatile that it can be laid on any surface you want.
You can install artificial grass over old concrete, patio paving slabs and also block paving directly. This is a fantastic process, as by being able to lay the artificial grass over existing concrete, you need not remove it, thereby saving plenty of time, money and effort.
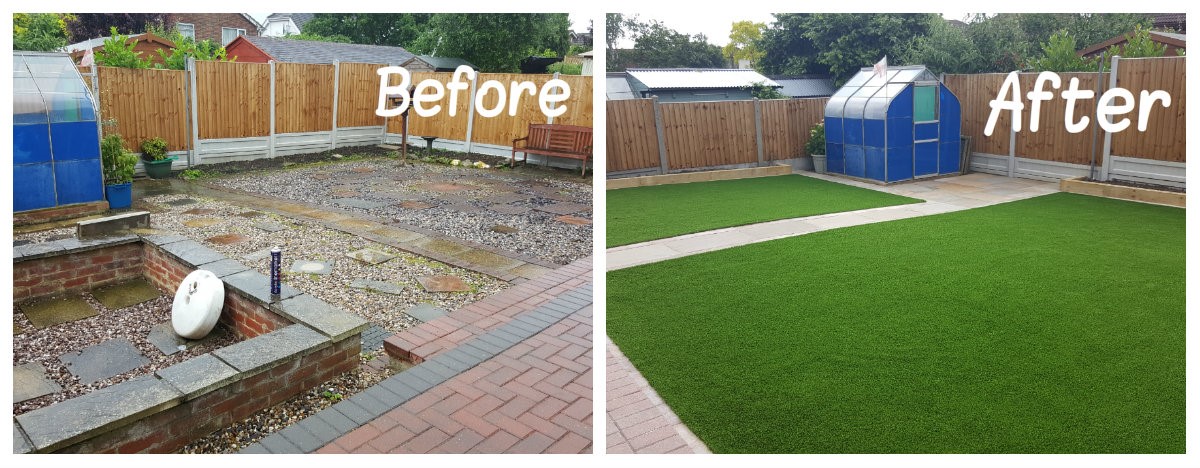
By following a few simple steps, you can turn the concrete outdoor areas of your home into lush green sanctuaries in no time.
Important Factors to Consider Before Installing Artificial Grass on Concrete
Before you go ahead with the process of installing the artificial lawn on the existing concrete in your home, there are few things that you must evaluate:
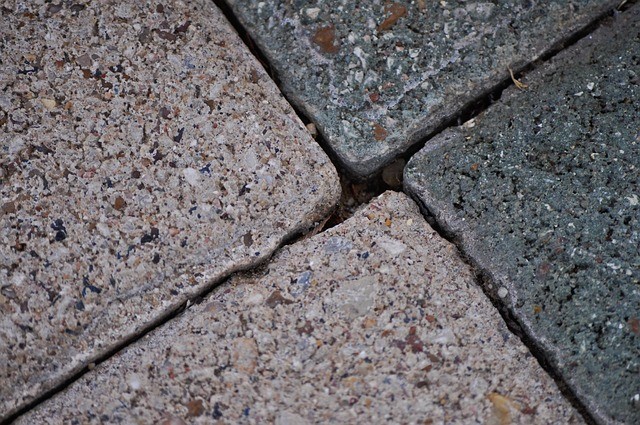
Suitability of Concrete
Not all concrete is suited for installing artificial grass. The old concrete floor must be in decent condition and provide a sturdy foundation. If the concrete base has large cracks and sections of the concrete have broken loose, etc., then it is not possible to lay the artificial grass directly onto the concrete.
Ensure the Drainage Is Adequate
Drainage is a very important aspect to consider as you don’t want water sitting on your newly laid artificial lawn. The concrete should ideally have a slight slant to allow the water to drain out properly.
Laying the Artificial Lawn on Uneven Concrete
The most important part of laying the artificial lawn on concrete of any type, especially if the surface is uneven is installing the foam underlay. The foam underlay has many advantages:
- It acts as a shock pad and provides a softer underfoot for the lawn as placing the artificial lawn on hard concrete will make the underfoot feel significantly harder.
- It helps to prevent injury in case you fall, making it feel like a real lawn.
- Laying a foam underlay can help to hide the cracks and uneven ridges in the existing concrete, as laying the artificial lawn directly on top of the concrete will cause all the uneven surfaces to show up making the lawn look very messy and uneven.
Make sure that the foam underlay that you use is of high-quality, as recycled or poor-quality foam underlays can have problems.
Installing Artificial Grass on Concrete
Here is a step-by-step guide to how you can lay your own artificial grass at your home.
Tools and Materials Required
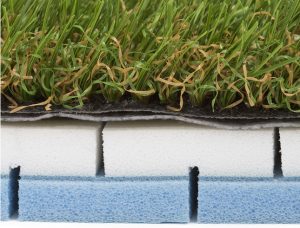
Foam Underlay (image: neograss.co.uk)
This is a list of some tools that you will require for the process of laying the artificial lawn.
Essential Tools
- Garden hose
- Broom
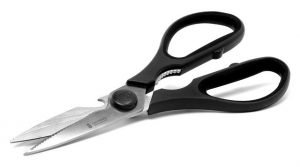
- Knife with a sharp blade
- Striping or filling knife (for spreading artificial grass adhesive)
Useful Tools (Optional)
- A paddle mixer to mix adhesive
- A jet wash
Materials Required
- Artificial grass (2 mm or 4 mm width depending on the area to be covered)
- Foam underlay (available in 2 m widths)
- Artificial grass adhesive
- Gaffer tape (to fix the foam underlay)
- Joining tape (to join the pieces of artificial grass, if required)
Once you have the required material and tools to lay the artificial grass, you can start the installation process by following these steps.
Cleaning the concrete
- The first step in the entire process is to prepare the concrete on which you plan to lay the artificial lawn.
- Using the self-leveling compound, fill in all the small cracks and uneven surfaces.
- Clean the concrete surface thoroughly, so that the adhesive for the artificial grass will bond properly with the concrete.
- Remove all the existing grass, weeds and moss, and if you have a problem with weeds use a weed killer beforehand.
- You can clean the concrete by either brushing it with a stiff broom or hose the area with water.
- Once the area is clean allow it to dry completely.
Installing Drainage Holes
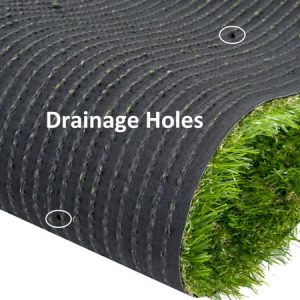
image: walmart.com
- Cleaning the concrete with water can help you assess how efficiently the water drains off from the surface.
- If there is no puddling and the water completely drains away, then you can move to the next step of lawn laying.
- If the water does not drain out completely and collects in puddles, then drill holes of around 16 mm wherever the water puddles form and fill the holes with shingles of 10 mm.
- This ensures that you will not have water standing on your artificial lawn if it rains.
Installing the Foam Underlay
- When the concrete is completely dry, you can move on to the next step of installing the artificial grass foam underlay or shock pad.
- Lay the foam at one end of the concrete and make sure that it covers the entire concrete right up to the other edge.
- Roll the foam out and cut according to the shape required.
- Make sure that foam has been cut to cover the entire concrete area.
- Using masking tape, join all the foam pieces together.
- Now you can start the adhesive process.
- Add hardener to the glue and mix it thoroughly.
- Apply the glue to the concrete using a striping or filling knife and make sure that the glue layer is around 2-3 mm thick so that it bonds properly.
- If the water drainage is via the concrete rather than through the drainage holes, leave gaps in the adhesive to let the water escape.
Cutting Grass and Preparing the Joints
- Once you have installed the foam properly, install the artificial grass by following the same process as above.
- Roll out the artificial grass and make sure that it covers the foam underlay properly.
- Cut the artificial grass as per the required size.
- If there are joints, to ensure that the joints are invisible, trim 3 stitches off the edge of each piece of artificial grass.
- Complete all your cutting before you begin the gluing process.
- Using tape, glue all the joints of the artificial grass together.
- Do not glue the joints to the foam directly as the pieces will move as you walk on the lawn.
- The best way is to first glue the joints and then once the glue goes off, glue the perimeter.
Gluing the Perimeter of the Artificial Lawn
- Once the glue is cured, you can start gluing the artificial lawn to the foam underlay.
- Apply the adhesive to the entire perimeter of the grass.
- Make sure that the adhesive covers the entire perimeter without any gaps.
- For the adhesive bond to form properly, stay off the lawn for a few hours so that the grass does not shift.
Adding Sand and Brushing the Grass
- You can move on to the last step of the artificial lawn installation once the adhesive has completely cured.
- Add kiln-dried sand to the artificial lawn or you can make use of non-sand infill. The advantages of sand infill are:
- The sand helps to weight down the artificial lawn and prevent any creases, wrinkles or ripples on the surface.
- It helps to prevent the artificial grass from becoming too hot by dissipating the heat.
- Helps to protect the grass fibers and ensures that they remain upright.
- Next, brush the artificial grass that helps to lift the fibers.
Your artificial lawn is now all ready for you to admire and enjoy. An artificial lawn is indeed a wonderful way by which you can give your garden a complete makeover. If time is of essence and money is not a showstopper, you can get professionals to lay your artificial lawn. However, if you have the time and love doing things by yourself, then this is a great opportunity to show off your “artificial lawn laying skills” by taking it up as a DIY project.